
In part 1 of this blog post, we covered information about the shortage of N95 respirator masks, and the need for a better DIY solution than fabric masks. If you haven’t read it yet, it’s good information to have so we recommend going back and reading it. This blog has information on exactly how to sew your own mask.
Making Your Masks
One vacuum bag can make around 2-3 masks, and it’s a pretty simple sewing project, even if you’re not an expert. You need:
- 12 x 14 inch section of fabric (a little more to make a bigger mask)
- HEPA filter vacuum bag (buy them at Vacuums 360 if you don’t have them already)
- Elastic to secure it around your face + a small flat piece of metal for the nose
- Pattern availablehere
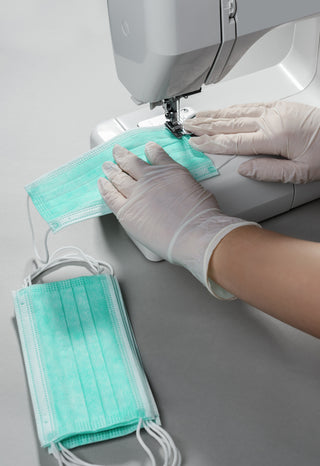
Mask Sewing Instructions
- Sanitize your workstation and any materials (scissors, needles, etc.).
- Fold your fabric in half and cut it out using the pattern above. Do this twice so you have a front lining and back lining (4 total pieces).
- Sew the center lining of the fabric together for the front and back. This is the curved edge that will go across your mouth and nose.
- Cut two pieces of HEPA bag using the pattern above.
- Sew the center seam of the two pieces of HEPA filter on the curved line; sew these by hand to avoid snagging it in your sewing machine.
- Sew the front and back together, leaving the bottom open to insert the filter. Put fabric inside out, then flip it right-side out after you sew the seams (seams will be inside).
- Insert the filter and sew the bottom edge. You can fold it under so the seam is only visible on the back.
- Measure the elastic to fit around your head, cut it and sew the ends together in a loop. Fold the outer edges of the mask, put the elastic inside the fold, and sew a small channel for the elastic to go through. Once sewn it should make a large circle loop that goes around your head with a top and bottom elastic for a tight fit.
- Sew or glue on the metal nose piece at the top center of the mask (optional).
You can find pictures to walk you through the sewing process on this website.
Keeping Your DIY Respirator Mask Clean
You will probably need to reuse your DIY respirator mask. To keep it clean:
- Wash your hands with soap and warm water for 20 seconds or use sanitizer before putting it on
- Do not touch the inside lining of the respirator
- Don’t use bleach, alcohol, or other disinfectants on the mask
- Store in a paper bag when not in use
Cover the mask with a bandana or scarf to prevent contamination when you go outside.
If you would like to wash the fabric, place just a few hand stitches in the bottom part of the mask instead of sewing it closed completely (where you inserted the filter). Unstitch it and remove the HEPA filter. Wash the mask in warm soapy water to clean it, air dry in a clean and sanitary spot, then insert a new HEPA filter and re-stitch the bottom. HEPA filters should not be reused or cleaned, so sew a new one after each cleaning.
Disclaimer: this blog is not medical advice and should not be used as a substitute for medical advice or advice from an epidemiologist. This is intended for informational purposes only.